
Every home barista knows the slight pang of regret that comes with knocking a beautifully extracted, warm espresso puck into the waste bin. You spent several minutes meticulously weighing your beans, adjusting your grind size, distributing the coffee bed with a WDT tool, and executing a flawless pre-infusion. The shot was spectacular, but those spent grounds still hold untapped potential. Instead of discarding them or tossing them directly into the compost, you can transform them into one of the most powerful flavor enhancers in your pantry. If you have ever wondered, "how do you make homemade espresso powder," the answer lies in a simple, satisfying process of drying, roasting, and pulverizing your leftover coffee pucks into a highly concentrated, soluble culinary tool.
The Real Difference: Espresso Powder vs. Instant Coffee and Fine Grounds
Before pulling out your baking sheets, it is essential to clarify what homemade espresso powder actually is, and what it is not. Many casual cooks mistake finely ground coffee beans for espresso powder. If you add standard ground coffee directly to a cake batter or a dry rub, you will end up with a gritty, unpleasant texture. Standard coffee grounds do not dissolve in liquid; they merely steep. True espresso powder is a fully dehydrated, highly concentrated form of brewed coffee that dissolves completely when introduced to moisture.
Commercial instant coffee and commercial espresso powder are manufactured using similar industrial methods—usually spray-drying or freeze-drying highly concentrated coffee liquid. However, commercial espresso powder uses dark-roasted espresso beans and is brewed at a much higher concentration, yielding a bolder, deeper flavor profile with lower acidity. When we make this ingredient at home, we bypass the need for industrial freeze-dryers by utilizing the spent coffee solids themselves, drying them completely, and running them through a second roasting process to caramelize the remaining sugars and oils. The result is a highly soluble, intensely dark powder that acts as a flavor multiplier, particularly when paired with chocolate.
Why Spent Espresso Pucks Are Your Best Raw Ingredient
It might seem counterintuitive to use spent coffee grounds rather than fresh, unused coffee beans to make espresso powder. However, using spent pucks is actually the superior method for both flavor and efficiency. When you extract a shot of espresso at 9 bars of pressure, the hot water washes away the highly soluble, volatile acids and light floral or fruity notes of the bean. What remains in the puck are the heavy lipids, structural celluloses, and deep, roasty melanoidins.
If you were to dry and bake fresh, unextracted coffee grounds, the remaining acids would concentrate, resulting in a harsh, intensely sour, and overly bitter powder. By using spent pucks, you are working with coffee that has already been balanced. The harsh, sharp acidic compounds are gone, leaving behind a clean slate of deep, roasty, dark-chocolate-like flavors. Additionally, this upcycling practice fits perfectly into a zero-waste kitchen, giving a second life to high-quality specialty beans that you have already enjoyed as a morning beverage.
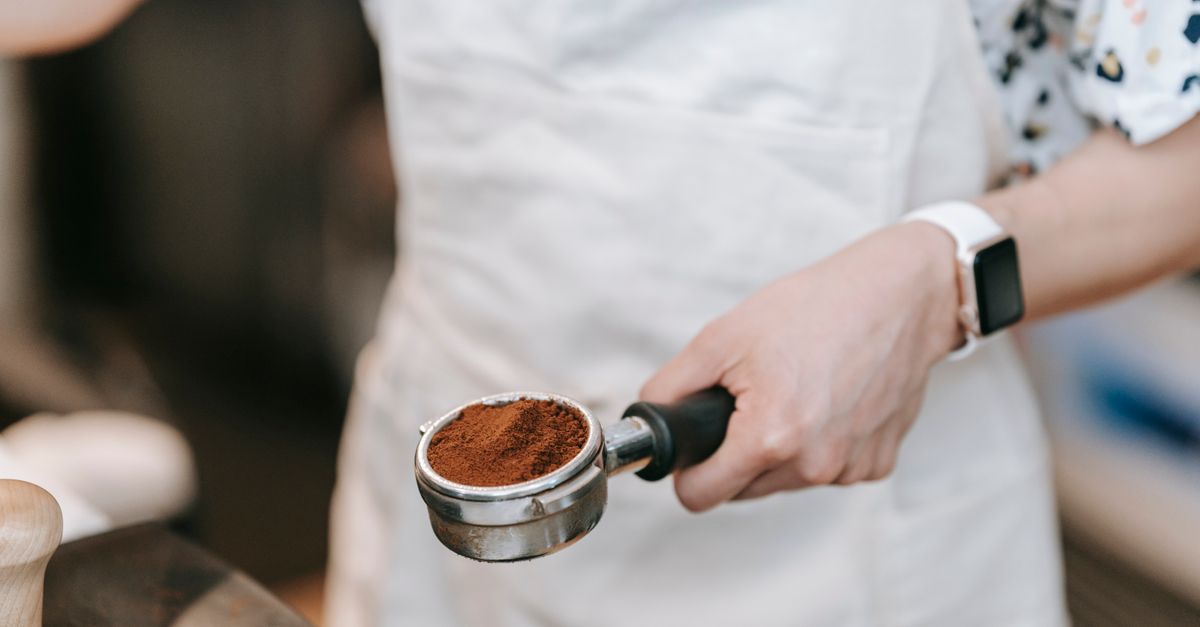
Step 1: Gathering and Preparing Your Spent Coffee Grounds
The first step in the process requires a bit of planning and proper hygiene. Coffee pucks are rich in moisture and organic nutrients, making them a prime breeding ground for mold if left in a closed container at room temperature. To accumulate enough grounds to make a worthwhile batch of powder, you must store your spent pucks correctly.
Do not leave your pucks sitting in a dark, damp knock box for days. Instead, after pulling each shot, break the warm puck apart onto a wide, flat baking sheet lined with parchment paper. Spread the grounds out in a thin, even layer. This allows the surface moisture to evaporate quickly, preventing green mold from developing. If you prefer to collect a large batch over a week or two, place your broken-up pucks into a zip-top bag and store them in the freezer. The freezing temperature halts any microbial growth, keeping the grounds perfectly fresh until you are ready to process them.
Step 2: The Dehydration and Toasting Process
Once you have gathered roughly one to two cups of damp coffee grounds, it is time to dry and toast them. This step requires precision. You want to remove every molecule of moisture without burning the delicate coffee oils, which would result in an acrid, smoky taste.
Preheat your oven to its lowest possible setting. For most modern home ovens in the US and Europe, this is around 170°F to 200°F (75°C to 93°C). If you own a food dehydrator, you can use that instead, setting it to its highest temperature. Spread your damp grounds across a baking sheet lined with clean parchment paper, ensuring the layer is no thicker than a quarter of an inch. Clumps will hold moisture, so use a fork or a whisk to break up any large chunks until the mixture resembles damp sand.
Place the baking sheet in the oven. Leave the oven door cracked open slightly—about an inch—to allow the escaping steam to exit. Bake the grounds for roughly two to three hours, stirring every 30 minutes. You will know the dehydration phase is complete when the grounds feel completely dry, light, and sandy to the touch, with absolutely no clumping when squeezed between your fingers.
Now comes the crucial step: the light toast. Increase your oven temperature to 300°F (150°C). Slide the dry grounds back into the oven for 10 to 15 minutes. Keep a very close eye on them during this window. You want to trigger a mild Maillard reaction and caramelize the remaining sugars inside the coffee structure. You will begin to smell a rich, sweet, toasted cocoa aroma. As soon as the aroma peaks and the color deepens to a dark, charcoal-brown, remove the pan from the oven and let it cool completely to room temperature.

Step 3: Pulverizing to a Soluble Powder
Once your toasted grounds are completely cool and dry, you must grind them into an ultra-fine, flour-like consistency. This is where many home baristas make a critical error that can damage their equipment.
- Practitioner Insight: Do not run these baked, super-dry, brittle grounds through your high-end home espresso grinder. Premium flat or conical burr grinders (such as a Baratza, Eureka, or Mahlkönig) are engineered specifically for raw, roasted coffee beans containing natural moisture and elasticity. Passing dry, pre-baked, highly brittle grounds through these burrs generates an immense amount of static, which can clog your grind chute instantly. Furthermore, the ultra-fine dust can bypass the burr chamber seals and migrate into the motor bearings, causing long-term mechanical damage.
Instead, use a dedicated electric blade spice grinder, a high-speed blender with a small dry-grains container, or a heavy granite mortar and pestle. A cheap blade grinder is actually the superior tool for this task because it pulverizes the brittle coffee structures through high-velocity impact rather than shearing.
Fill your blade grinder halfway with the cooled, toasted grounds. Pulse the grinder in short, five-second bursts to prevent the blades from heating up, which can scorch the powder. Continue grinding for about two to three minutes until the mixture looks like fine dust. To ensure maximum solubility, pour the ground powder through a fine-mesh sieve or a flour sifter. Any larger particles that do not pass through the sieve should go back into the grinder for another round of processing. The final product should be a soft, velvety powder that dissolves almost instantly when rubbed between wet fingertips.
Alternative Method: Starting with Fresh Beans
If you do not drink espresso regularly but still want to make high-quality homemade espresso powder for baking, you can use fresh, unbrewed coffee beans. However, to avoid the harsh acidity mentioned earlier, you must simulate the extraction process first.
To do this, grind your fresh beans to a medium-coarse consistency, as if you were making a drip coffee or French press. Brew the coffee using a high ratio of water to coffee—roughly 1:16—to wash away the soluble acids. You can drink the resulting coffee or use it for another recipe. Take the wet, extracted grounds from your filter, spread them onto your parchment-lined baking sheet, and proceed with the dehydration and toasting instructions detailed in Step 2. This extra step ensures your final powder remains smooth, sweet, and deeply caramelized, without the aggressive sourness of unextracted beans.

Storage, Shelf Life, and Moisture Control
Because your homemade espresso powder is completely dehydrated and highly concentrated, it is incredibly hygroscopic. This means it will actively absorb moisture from the surrounding air at any given opportunity. If left exposed to the atmosphere, a beautiful jar of loose powder can turn into a rock-hard, sticky, unusable brick within a matter of days.
- Practitioner Insight: To preserve the powder, store it in a small, airtight amber glass jar. The amber glass protects the delicate coffee lipids from light degradation, which can make the oils taste rancid over time. Before sealing the jar, drop in a small, food-safe silica gel packet (the kind often found in seaweed packaging or vitamin bottles). This packet will intercept any ambient moisture that enters the jar when you open it, keeping your powder dry, free-flowing, and easy to scoop for up to six months.
Always store the jar in a cool, dark pantry away from the steam of your oven, stovetop, or espresso machine. If your powder does begin to clump over time, do not worry. You can easily break up the clumps by shaking the jar vigorously or passing the powder through a small sieve before adding it to your recipes.
Culinary Applications: Put Your Homemade Powder to Work
Once you have a jar of this dark gold in your pantry, you will find endless ways to use it. The absolute best application for homemade espresso powder is in chocolate baking. Coffee and chocolate share a vast number of chemical flavor compounds, particularly pyrazines. When you add a teaspoon of espresso powder to a chocolate cake, brownie batter, or chocolate mousse, it does not make the dessert taste like coffee. Instead, it acts as a flavor enhancer, deepening the cocoa notes, cutting through the heavy sweetness, and making the chocolate taste vastly richer and more complex.
Beyond desserts, this powder is a spectacular addition to savory dishes. Try adding a tablespoon of your homemade powder to a dry rub for smoked brisket, ribeye steaks, or pork chops. Combine it with brown sugar, kosher salt, smoked paprika, garlic powder, and black pepper. The caramelized coffee notes pair beautifully with the char of a grill or the smoke of a wood fire, creating a deeply savory crust. You can also whisk half a teaspoon into a classic beef chili or a red wine pan sauce to add an earthy complexity that guests will struggle to identify but will instantly love.
For beverage enthusiasts, you can use this highly soluble powder to dust the top of a freshly poured espresso martini, stir it into hot milk with cocoa powder for an adult hot chocolate, or blend it with ice and vanilla syrup for a quick homemade frappé. The possibilities are limited only by your culinary imagination.
By taking control of this simple process, you turn a daily waste product into a high-value culinary ingredient. It requires nothing more than a bit of patience, a warm oven, and the willingness to look at your morning espresso routine with a fresh pair of eyes. Your baking, your savory cooking, and your environmental footprint will all be the better for it.


